Two Savior carries alternate full skill bars behind a mounted barrier and a thirty-hit Orserk engine.
Hartalis arrives with Savior, an innate passive that raises both Neutral and Grass damage by 30%, 130 base Attack, a 15-second mounted barrier in the current data and an unusually deep level-70 skill list. This version uses two Hartalis so each Pal owns an independent active-skill bar and can take over while the other cools down. Cremis adds 15% to 30% Neutral-Pal Attack, Orserk converts recent player bullet hits into up to thirty Attack and Defense stacks on the active Pal, and Silvegis protects the trainer's shield. It deliberately gives up the health-draining maximum-damage slot for a safer rotation that can be piloted repeatedly.
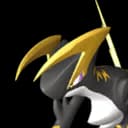
Primary Neutral carry with 130 base Attack, innate Savior for 30% Neutral and Grass damage, and Sacred Barrier recorded at a 5-second cooldown with a 15-second effect window.
First independent active-skill bar and the opening mounted barrier.
Recruitment route
Raid reward from a Hartalis slab at the Summoning Altar; normal and Ultra encounters are levels 70 and 80.
Raises the Attack of Neutral Pals by 15% to 30%. One copy supports either Hartalis, and a second Cremis or Ribbuny would not add another identical effect.
Neutral Pal Attack15% →30%This palUnique effect · does not stack
Recruitment route
Very early wild catch at levels 1 to 9, so the support species is easy even though the carries are not.
Each player bullet hit grants the active Pal 1% to 5% Attack and Defense for 5 seconds, up to thirty stacks. The ceiling is 30% at rank 1 or 150% at rank 5 if the hit stream is maintained.
Active Pal Attack and Defense per hit1% →5%Active palUnique effect · does not stack
Recruitment route
Current acquisition is tied to the World Tree, making this an endgame support slot.
From a party slot, shortens shield regeneration delay by 30% to 60% and reduces damage taken by the player's shield by 65% to 80%. No mounting condition is attached to these rows.
Shield Regen Delay Reduction30% →60%YouUnique effect · does not stack
Shield Damage Reduction65% →80%YouUnique effect · does not stack
Recruitment route
Level 62 field-boss route, available before the Hartalis raid itself.
TipThe short version
Buff the first Hartalis, mount to establish Sacred Barrier, then land rapid bullet hits until Orserk reaches its thirty-stack ceiling. Spend Holy Burst, Radiant Barrage and Sacred Rain into a stable target, using the barrier to stay close enough for the multi-hit areas to connect. When that bar is empty, recall and deploy the second Hartalis, rebuild Orserk stacks on the new active Pal and fire its Divine Wing, Wind Burst and Purifying Light rotation. Silvegis keeps the trainer's shield recoverable during the swaps; Pal Recovery Grenades handle damage that reaches either carry.
// 02
Condensation scaling
Rank 1 → Rank 5
Compare every surfaced partner effect at base rank and full condensation. Effects marked Unique can still scale by rank, but a second carrier of the same species adds nothing. Two different species carrying the same effect do add together.
Pal / role
Partner effect
Affects
Rank 1
Rank 5
CremisNeutral Attack support
Neutral Pal AttackUnique
This pal
15%
30%
OrserkBullet-stack engine
Active Pal Attack and Defense per hitUnique
Active pal
1%
5%
SilvegisTrainer shield guard
Shield Regen Delay ReductionUnique
You
30%
60%
SilvegisTrainer shield guard
Shield Damage ReductionUnique
You
65%
80%
Values verified against current partner-skill rank curves
// 03
Passives to implant
4 core · 6 total
Savior consumes one slot on every Hartalis by design. The remaining three slots decide whether the carry prioritizes cooldowns, reliable damage or control resistance.
Savior
All five slots
Rank 4 · No roll pool
30% increase in Neutral attack damage. 30% increase in Grass attack damage.
Savior is Hartalis's innate passive and should be preserved. It gives 30% Neutral and 30% Grass damage, strengthening both the main Neutral bar and Wind Burst.
How to get it
Innate on Hartalis raid rewards. Do not overwrite or breed it away from the final carry.
Serenity
All five slots
Rank 3 · Standard pool
Active skill cooldown reduction 30% Attack +10%
Serenity reduces active-skill cooldowns by 30% and adds 10% Attack. Two skill bars already shorten downtime; Serenity keeps each bar returning sooner on its next deployment.
How to get it
Breed or implant it onto both Hartalis copies.
Legend
All five slots
Rank 4 · No roll pool
Attack +20% Defense +20% Movement Speed increases 20%
Legend supplies Attack, Defense and movement speed without adding a conditional upkeep requirement.
How to get it
Breed from a Legend carrier or apply the implant to each completed Hartalis.
Immortality
All five slots
Rank 4 · Mutation
Absorbs 100% of damage dealt and restores Health. Pal Auto Health Regeneration Rate +100%. Attack +15%.
Immortality adds Attack, regeneration and damage-based healing. It is the safer fourth slot for a carry that remains active through a full burst sequence.
How to get it
Mutation pool or ancient-relic implant route.
Diamond Body
Nice to have
Rank 4 · Standard pool
Defense +30% Immune to Flinch Immune to Knockback
Diamond Body replaces Immortality when flinch and knockback are interrupting the expensive 30-second skills. It gives Defense and immunity to both control types.
How to get it
Use the passive implant on the Hartalis assigned to the more dangerous half of the rotation.
Stronghold Strategist
Nice to have
Rank 3 · Standard pool
10% increase in Player Defense.
Stronghold Strategist belongs on Cremis, Orserk and Silvegis. Those slots are not field attackers, so increasing trainer Defense supports the bullet-stack job directly.
30% player Defense across the three dedicated support Pals
How to get it
Buy the implant once and apply it to the support trio.
// 04
Gear and loadout
14 picks
The player kit has two responsibilities: keep Orserk stacks alive and keep both Hartalis copies buffed and healthy. Raw trainer damage is secondary.
Barrier and stack tools
The saddle enables the defensive identity. A rapid firearm is the verified Orserk trigger; drone behavior remains a community finding.
Recent player reports say drone hits maintain Orserk stacks. The dataset records only that bullet hits trigger the buff, not whether drones qualify, so keep a firearm ready and treat drones as optional support.
A launcher that fires drones which perform autonomous attacks. Capable of deploying up to 9 units, enabling sustained suppression.
Paloxite Ingot ×70World Tree Holy Water ×40AI Core ×8Ancient Civilization Core ×5
Carry support
Apply these to whichever Hartalis is active, then repeat after the swap.
The Megaboost Gun strengthens the active Hartalis before its burst. Use the technology 25 Boost Gun until technology 63.
Firing it at an allied Pal boosts their attack and defense, while hitting an enemy deals damage. Thanks to improvements, the boost is stronger and lasts longer, and it deals more damage to enemies.
Dogen Emblem raises both player and active-Pal Attack, helping the support gun and the Hartalis burst at once.
An accessory that greatly raises your Attack, and that of the Pal fighting alongside you.
Refined Ingot ×20Bone ×30Paldium Fragment ×35Ancient Bone ×30
Hartalis I skill bar
A close-to-mid-range Neutral burst bar. Multi-hit skills need a stable target, so catalog power is not treated as guaranteed damage.
Burst one
Holy Burst
Native at level 15, Neutral, 700 catalog power and a 30-second cooldown.
Burst two
Radiant Barrage
Native at level 22, Neutral, 700 catalog power and a 30-second cooldown.
Burst three
Sacred Rain
Native at level 40, Neutral, 800 catalog power and a 30-second cooldown. Place it only when the target is unlikely to leave the area.
Hartalis II skill bar
A mixed Savior bar that gives the second copy different ranges and timing rather than duplicating the first exactly.
Engage
Divine Wing
Native at level 30, Neutral, 700 catalog power and a 30-second cooldown.
Grass payoff
Wind Burst
Native at level 70, Grass, 600 catalog power and a 30-second cooldown. Savior strengthens Grass as well as Neutral.
Long-cycle finisher
Purifying Light
Native at level 50, Neutral, 250 catalog power and a 100-second cooldown. Use it for its actual hit behavior, not as a short-loop filler.
// 05
Stat point priority
Highest priority first
The Pal pair delivers the burst. Trainer points keep the stack engine alive, mobile and supplied during the swaps.
1HealthFirst. The trainer must stay exposed long enough to land thirty recent bullet hits and cannot rely on Sacred Barrier during every swap.
2StaminaSecond. Dodging while stacks are built and remounting into the barrier are the main execution checks.
3WeightThird. SMG ammunition, boost rounds, Pal Recovery Grenades and multiple accessories make this a heavy support kit.
4AttackLast in the safe rotation. Bullet frequency drives Orserk; the player's personal damage is welcome but not the reason to fire.
// 06
How to play it
6 steps
Every swap moves the Orserk recipient, so treat each Hartalis as a fresh burst cycle rather than assuming the first Pal's stacks transfer.
1Deploy optional drones and buff Hartalis I
Apply food and the Megaboost Gun before aggro. Drones may help according to current field reports, but the SMG remains the verified stack source.
2Mount and activate Sacred Barrier
Use the barrier to enter safely and establish the range needed for Holy Burst, Radiant Barrage and Sacred Rain.
3Land thirty rapid bullet hits
At Orserk rank 1 the ceiling is 30% Attack and Defense; at rank 5 it is 150%. Keep hitting because each stack is tied to a five-second recent-hit window.
4Spend the first three-skill bar
Fire the area skills while the boss is stationary or committed. Do not read the catalog power as guaranteed if part of a multi-hit area misses.
5Recall, deploy Hartalis II and rebuild stacks
The active-Pal recipient changed, so shoot again before spending Divine Wing, Wind Burst and Purifying Light.
6Heal, re-barrier and return to the first copy
Use Silvegis shield recovery during the reset. Refresh the boost, throw recovery grenades and repeat once the first bar is ready.
// 07
What this build turns down
4 considered
The maximum-damage Hartalis shell is not the same as this repeatable rotation. These choices were considered and intentionally left outside the default five.
Celesdir Noct as a mandatory slot
The case for it Its health-drain trade raises the active Pal's Attack and is common in maximum-damage Hartalis parties.
The shipped description says 40%, while the normalized rank rows are zero and do not confirm a larger condensed curve. It also drains the carry continuously. This safe rotation keeps a second Hartalis and Silvegis instead, while listing Celesdir Noct as the aggressive variant.
Running Cremis and Ribbuny together
The case for it Both raise Neutral-Pal Attack, so two supports should double the party bonus.
Both effects are 15% to 30% and explicitly non-stacking. They are substitutes, not partners.
Using Lapure for Hartalis active skills
The case for it Lapure reduces partner-skill cooldowns, so it should also refresh Holy Burst and the rest of the move bar.
Lapure acts on partner skills, not ordinary active-skill cooldowns. Sacred Barrier already records a 5-second cooldown against a 15-second effect, so the slot does not solve the rotation this build is rotating around.
Assuming drone hits are a dataset-confirmed Orserk trigger
The case for it Drone Launcher fire can maintain all thirty stacks without the player shooting.
Recent players report that behavior, but the installed data says only bullet hits and does not identify drones. The guide keeps drones optional and uses an SMG or rifle as the reproducible trigger.
// 08
Where to get everything
6 stops
This is a true endgame project: two raid carries, a World Tree support Pal, a level-70 saddle and several advanced support items.
Clear the Hartalis raid twiceHartalis comes from Summoning Altar slab content at level 70, with an Ultra level-80 version. Two carry copies need two rewards or a later breeding route.Hartalis guide
Preserve Savior on both carriesSavior is innate and provides 30% Neutral plus 30% Grass damage. Keep it through every breeding and passive decision.
Catch Cremis and SilvegisCremis is an opening-region level 1 to 9 catch. Silvegis is a level 62 field boss and should be ready before the raid project finishes.
Obtain Orserk from the World TreeIts rank is the largest support investment: the per-hit row grows from 1% to 5%, changing the thirty-stack ceiling from 30% to 150%.
Unlock the Hartalis Saddle at technology 70The saddle enables the mounted barrier and is required for the build's safest engagement pattern.Hartalis Saddle
Build both skill bars before final condensationLevel both Hartalis copies to 70 so every native option is available, test which multi-hit skills land on the intended bosses, then commit souls, awakening and rank resources.
// 09
Alternates and flex picks
3 viable swaps
Keep the build's identity while adapting the lineup to the pals you own or the encounter ahead.
Each copy owns a separate active-skill bar and cooldown state. The second lets you continue with another three-skill burst instead of waiting on the first. Sacred Barrier itself is not being stacked.
How large is Orserk's buff?
Each recent bullet hit grants the active Pal 1% Attack and Defense at rank 1 or 5% at rank 5, up to thirty stacks. That makes the ceiling 30% or 150% while the five-second hit window is maintained.
Does Silvegis have to be mounted?
No. Its current shield regeneration and shield damage-cut rows target the trainer from a party slot. The description says while in party, and the effects are 30% to 60% faster regen start and 65% to 80% less shield damage.
Should I replace Cremis with Ribbuny?
Either is valid. Both give the same non-stacking 15% to 30% Neutral-Pal Attack curve. Do not use both expecting two bonuses.
Is Celesdir Noct more damage?
Its description adds 40% active-Pal Attack in exchange for continuous Health loss, so it is the aggressive direction. The current rank rows expose zero and do not verify larger condensed claims, which is why this guide lists it as an alternate instead of building a headline total around it.
Which Hartalis skills are best?
Use the set that actually lands on the target. Holy Burst, Radiant Barrage and Sacred Rain form the default first bar; Divine Wing, Wind Burst and Purifying Light diversify the second. Multi-hit areas can underperform their catalog power on small or mobile enemies.






Comments
Loading discussion...