Stop grinding loot tables for gear you can just walk to#
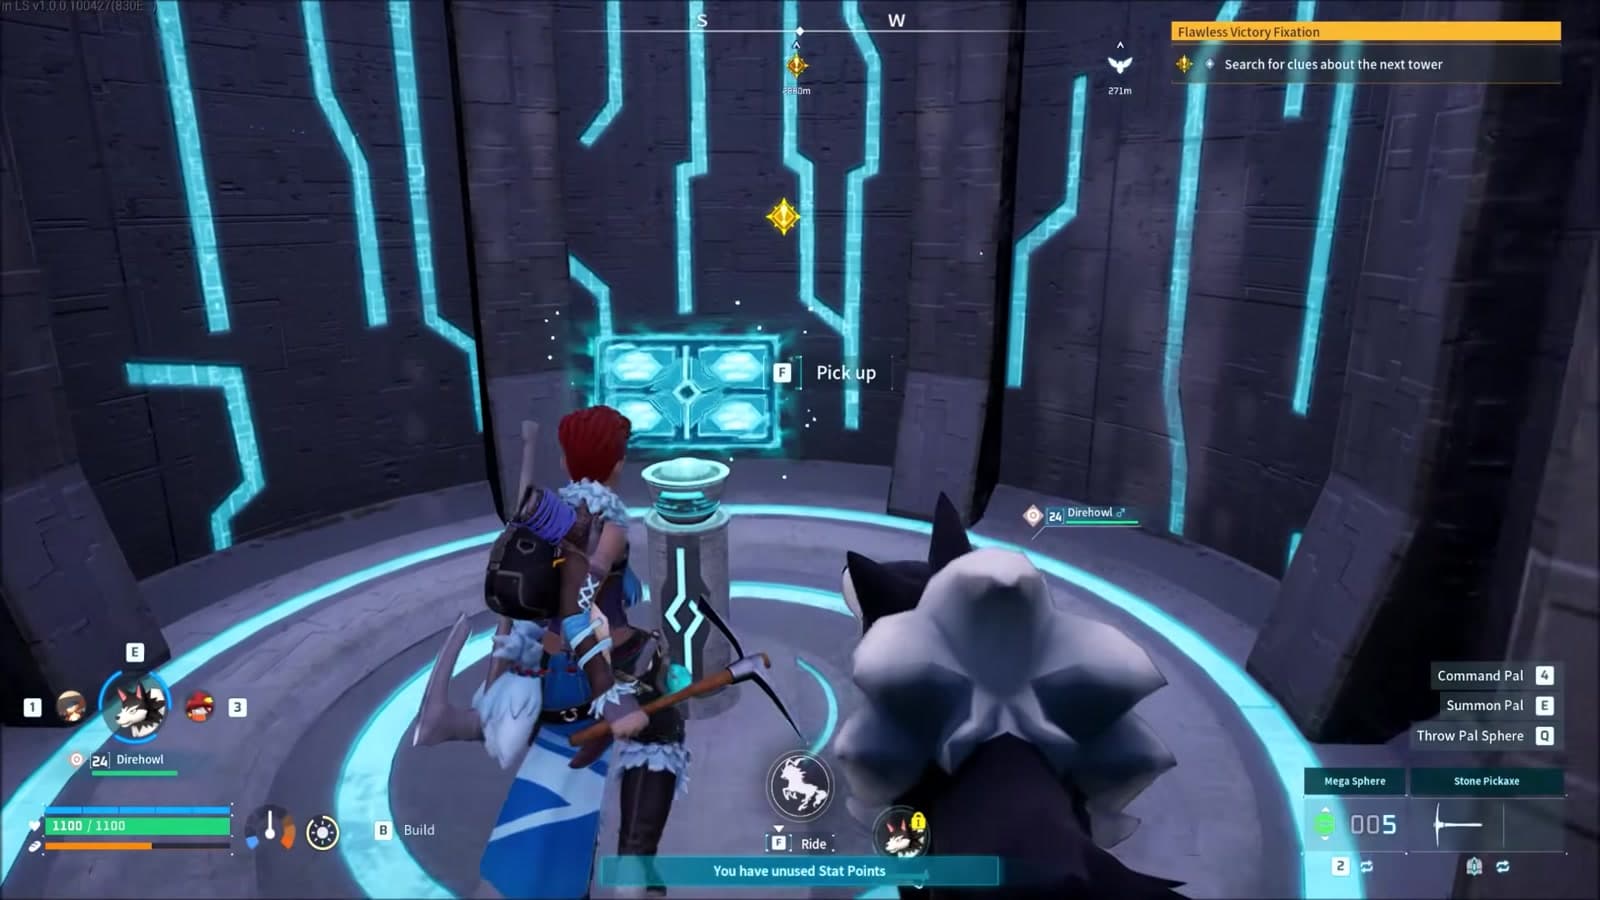
Palworld 1.0 buried some of the best mid game gear in plain sight. The overworld ancient ruins, the little puzzle towers you glide past on the way to a fast travel point, hand you rare weapon and armor schematics with zero RNG. No loot table, no boss farm, no drop rate praying. You solve a five second puzzle or smash a couple of rocks, and the schematic is yours.
Below is the short list of ruins worth a detour and the overworld NPC missions that pay out way above their effort. Clear these and you will out gear most of the mid game before you ever touch an assembly line.
Why ancient ruin towers beat the grind#
Every one of these towers works the same way. You spot it on the overworld, you clear a trivial puzzle or break some rocks, and a chest inside hands you a guaranteed schematic. Because the reward is fixed, there is no farming involved. As the source video from Verlisify puts it, whenever you see one, just do it.
The other reason to prioritize them: most of the gear inside only needs the basic weapon workbench, not a full weapon assembly line. That means you can start crafting rare weapons far earlier than the tech tree suggests.

The tower schematics worth grabbing#
Here is the checklist of ruin rewards called out in the run. Locations in Palworld 1.0 are semi randomized per world, so treat these as "clear the tower you find" rather than fixed coordinates.
- Life Pendant schematic, an easy early defensive accessory
- Makeshift Assault Rifle, rare, craftable on the basic weapon workbench
- Cold Resistant Metal Armor, a big rare armor upgrade
- Heat Resistant Metal Armor, the hot climate counterpart
- Metal Helm and Resistance Rings for element specific fights
- Epic Crossbow, one of the easier epic weapons to reach
- Defense Pendant and Attack Pendant for stat rings
- Feathered Hairband schematic, a cheap early headpiece near the starting area
- Anubis Talisman schematic for the high end, once you can handle the level
A few standouts from that list. The Makeshift Assault Rifle is the centerpiece. It is a rare schematic you can craft without a weapon assembly line, so it slots in as an early damage spike. Fire is a great support element for it too, so keep a  Wixen around for the damage buff.
The Cold Resistant Metal Armor and Heat Resistant Metal Armor ruins are pure armor upgrades with no fancy production required. Grab both and you are set for the snow and volcano biomes. Speaking of the volcano, one of these towers doubles as a new fast travel unlock toward the Scars of War lava region, so the old middle of nowhere trek is a lot shorter now.
For the low effort early stuff, the Feathered Hairband schematic sits right next to the starting hill, and the Life Pendant is about as close to free as gear gets.
Set up your weapon crafting first#
Before you start hammering out those weapon schematics, get your crafting bench right. Two things make a real difference:
- Put a
 Ribbuny on the weapon workbench. It is a handiwork specialist, so it churns through weapon crafts fast. If you have not visited a wildlife sanctuary for the top tier work pals yet, Ribbuny does the job just fine. A
  Lunaris edges it out slightly if you have one, but the difference at the table is small.
 - Buy High Quality Pal Oil in the fishing village. The makeshift weapons need
 High Quality Pal Oil, and you can just buy it rather than farm it. That removes the last friction point between you and a rare rifle.
You do not need a weapon assembly line for any of the makeshift gear. The basic workbench, plus a good handiwork pal, plus bought oil, is the whole setup.
Overworld missions that pay out big#
The ruins cover gear. The overworld NPC missions cover everything else, and a few of them are absurdly generous for the effort. If you see a hut or a person on the map, talk to them. Worst case you get free experience, best case you walk away with a rare launcher schematic.
Show a Pal, get paid#
Early on, one NPC just wants you to show him the requested Pal. Bring a  Flopie and he hands over 3,500 gold coins plus three Homeward Thundercloud items right at the start of the game. The Homeward Thunderclouds alone are worth the trip since they teleport you back to base.
Two more show a Pal quests hand out heavy weapons:
- Show a Wixen to the NPC outside Victor and Shadowbeak's tower for a rare Grenade Launcher schematic and a rare Pal Metal Helmet.
- The old easy Rocket Launcher gimme on Feybreak, where you just showed a
 Leezpunk, got changed. Now you need to bring an easygoing
  Yakumo, which runs higher level, but the schematic is still worth it.
The Nightstar Sand quest is the standout#
This one is genuinely wild. Near Feybreak island there is a quest NPC, not the tower, who asks for 10  Nightstar Sand. Wait for night, dig it up on the beach, turn it in, and you get a rare Pal Metal Helmet and a rare Flamethrower schematic.
Getting to Feybreak is the only real hurdle. Call out a  Chillet to cross the water, aim for the fast travel point first so you never have to swim it again, and the trick is simply not dying on the way in.
The nearby chest sweetens it further with a Vanguard Charm. That accessory rolls Health Up level four plus heat and cold resistance level three in one slot, which is an outstanding stat block for a single ring. It costs some polymer and ancient bones to craft, so bank the schematic for when you have the materials.

Turn ins and scaling settlement missions#
A few more repeatable earners:
- Hexolite Quartz turn in. Pick up 10
 Hexolite Quartz off the ground and hand them in for a big lump of money and experience.
 - Settlement scaling missions. Settlements have NPCs that reward your overall progress. A veteran pays out if you have beaten boss Pals, a researcher rewards you for catching different species, Fisherman's Point rewards sheer catch volume, and Dune Shelter has a gourmet with its own rewards. These scale with what you have already done, so they are close to free.
Use the interactive map to plan your route#
You do not have to stumble into these blind. Pull up an interactive map of the ancient ruins, hover a location, and it shows exactly which schematic is inside, from the Anubis Talisman down to a Ring of Grass Resistance. Look up the specific weapon or armor you want, then plan a loop that hits it on the way to somewhere you were already going.
Our own interactive Palworld map is built for exactly this kind of routing, and the farming guides break down where the supporting materials come from. If you are chasing the true top end instead, our guide to legendary armor and weapons in Palworld 1.0 covers the endgame schematics these ruins lead up to.

Two more gear tips before you go#
- Fishing pulls weapon schematics. Fishing effectively rolls the same chest loot table, so you can hook weapon schematics straight out of the water. It is RNG, but it runs in the background while you do other things.
- Open every chest. Since fishing mirrors chest loot, the reverse holds too. Cracking overworld chests is another steady source of schematics.
Once the Makeshift Assault Rifle is built, it hits around 30 damage on headshots with a fast fire rate and a solid reload, a clean upgrade over your starter gun. Pair it with a fire buffer like Wixen and you are punching well above your level for a weapon you got out of a five second puzzle.

Credit to Verlisify for the overworld route and mission breakdown this guide is based on. For everything you can build next, browse the full Palworld tools and guides and start planning your gear loop.

When activated, Wixen changes the player's attack type to Fire and increases Attack by 30%.


 Flame Organ×1–2
 Advanced Technical Manual×1

While in party, modifies the performance of the equipped glider. Enables high-speed gliding and allows shooting with the right hand.

 Galeclaw Poultry×1
 Leather×1
While in party, increases Attack of Neutral Pals by 15%. (Does not stack) While at a base, increases the Handiwork Work Suitability Level for all other Base Pals by +1. (Does not stack)
Leather×1 Beautiful Flower×1
While in party, spheres home in on Pals, and carrying capacity increases by 300. (Does not stack)
 Paldium Fragment×2–3



While in party, appears near the player. Automatically picks up nearby items.

 Low Grade Medical Supplies×1
 Lettuce Seeds×1–2
When activated, Leezpunk and the player become invisible, making them undetectable to enemies for 10 seconds.
 Copper Key×1
 Silver Key×1
Can be ridden. While fighting together, 15% increased chance of encountering pals with the same Passive Skill as this Pal. (Excludes certain Passive Skills)
Leather×1–2



Can be ridden. While mounted, changes the player’s attack type to Dragon and increases Attack by 5%.
 Leather×2–3
 Ice Organ×2–3



Comments
Loading discussion...